Pay Links
You can easily oversee generated pay links in the Pay Link dashboard section. Manage link specifics, and activate or deactivate as needed for seamless control. BoomFi enables you to create Recurring and One-Time pay links.
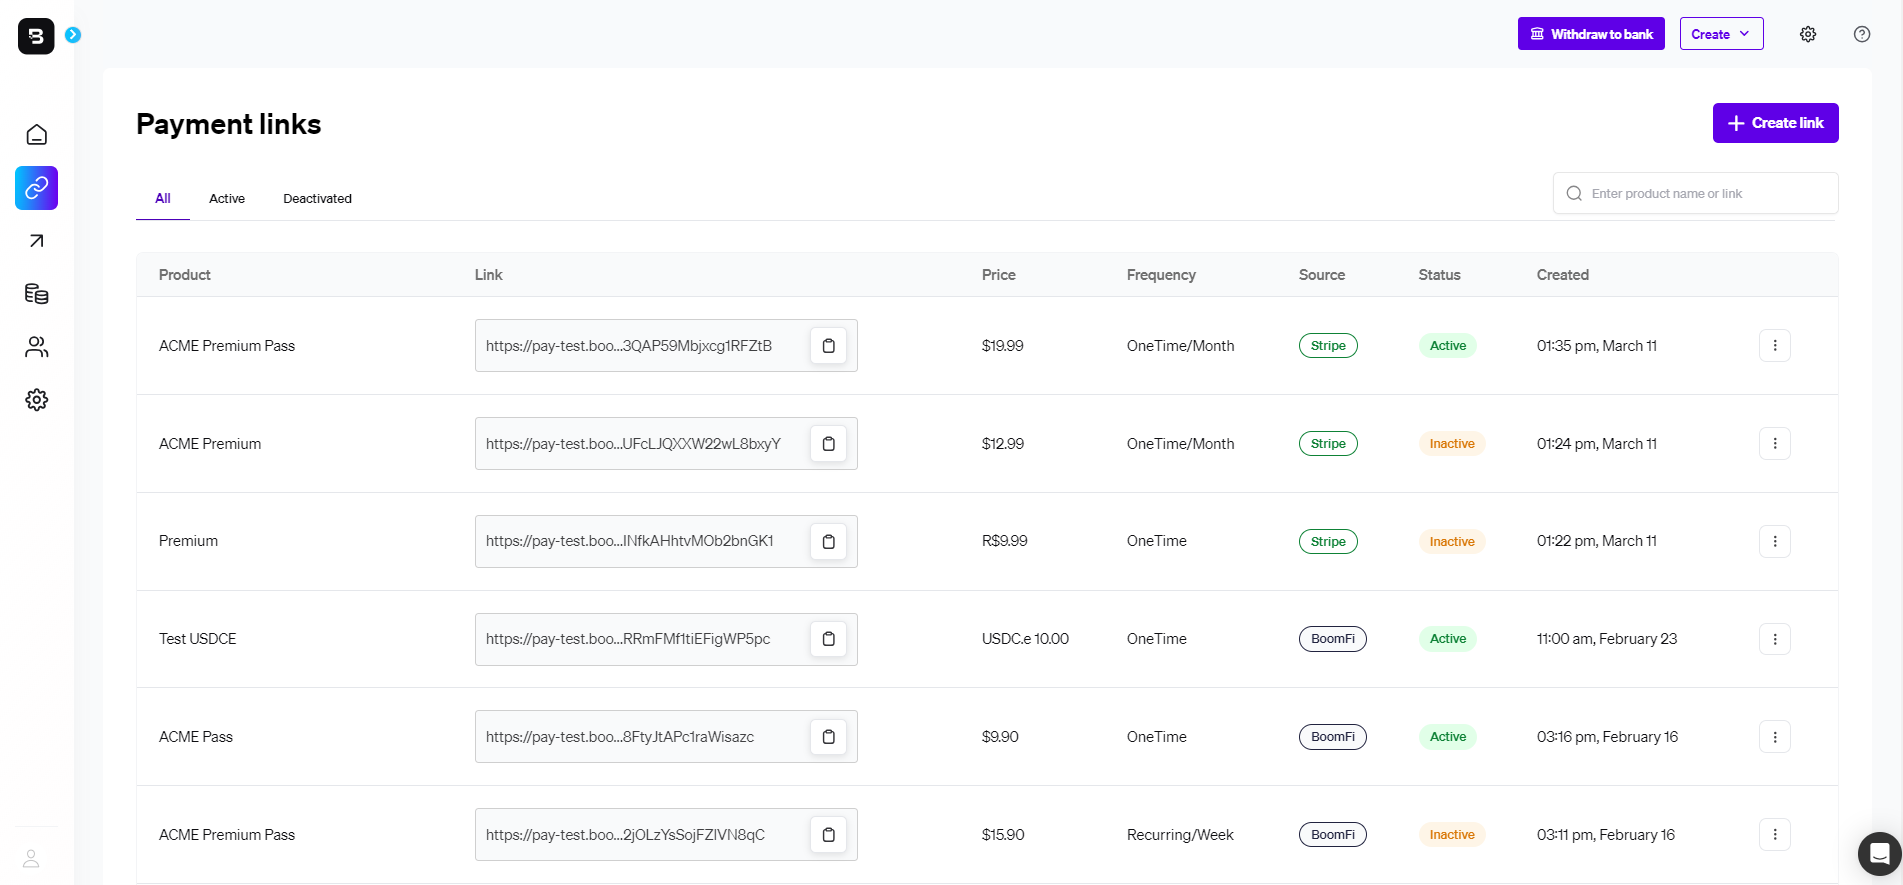
In the Payment Links section on the main page, displayed in the image above, you will find a table displaying all of your created payment links. The table includes various details, such as:
| Field | Description |
|---|---|
| Product | Name of the product. |
| Link | URL link to the checkout for the product. |
| Price | Price of the product. |
| Frequency | How often the billing recurs (One-time, Recurring). |
| Source | The billing system that generated the paylink (BoomFi, Stripe, Chargebee, etc). |
| Status | Current availability of the paylink. |
| Created | Date when the paylink was created. |
One-time payment links
With BoomFi, creating one-time pay links is a straightforward process.
Benefits of One-time Pay Links:
- Simplicity and Convenience: Eliminate the need for customers to navigate a traditional online store or checkout process.
- Multi-chain Crypto Payments: Accept payments in various cryptocurrencies across multiple blockchain networks.
- Quick Setup: Easily create one-time pay links in just a few clicks.
Recurring payment links
BoomFi streamlines the process of automating billing for subscribed customers, with billing intervals set for each link.
Benefits of Recurring Pay Links:
- Predictable Revenue: Generate a steady income stream, aiding in financial forecasting and planning.
- Customer Retention: Encourage customer loyalty by simplifying the payment process, making it easier for continued service or product use.
- Reduced Churn: Automated payments decrease the likelihood of cancellations due to forgetfulness or inconvenience, thus lowering churn rates.
Create a pay link
How to Create a Pay Link:
- Access the BoomFi Dashboard: Start by logging into your BoomFi account.
- Navigate to Pay Links:
- Go to the Pay Link section within your dashboard.
- Create a New Pay Link:
- Click the 'Create a Pay Link' button located at the top right corner of the screen.
- Enter Pay Link Details:
- Product Name: Enter the name of your product.
- Description (optional): Add a brief description of the product or sale.
- Default Price: Specify the price in USD.
- Default Network: Choose the blockchain network(s) to accept payments.
- Payment Type: Select either One-time or Recurring Payments. For this example, we’ll select One-time.
- Unique Product Identifier (Optional): Either set your identifier or use our automatic generator.
- Finalize Your Pay Link:
- Click 'Continue' to create your Pay Link.
- Share Your Pay Link:
- ✅ Done! Your Pay Link is now ready.
Your new pay link will be similar to this:
https://pay.boomfi.xyz/Pr1l6WoErz
Sharing your Pay Link 🔗
After generating your Pay Link with BoomFi, you can share it with your customers through multiple channels:
Here are a few common ways to share your Pay Link:
- Email: Copy and send the Pay Link directly to your customers via email.
- Website or Blog: Embed the Pay Link in an appropriate section on your website or blog.
- Social Media: Share the Pay Link on platforms like Facebook, Instagram, or Twitter.
Connecting a customer to the pay link
When sending a pay link to a customer, you have the option to make a connection of the pay link with your customer through this customer's id. You can incorporate their id at the end of the pay link's URL, adding the parameter customer_ident. Below, you can see an example:
Original pay link URL
https://pay.boomfi.xyz/Pr1l6WoErz
Pay link URL with customer's id
https://pay.boomfi.xyz/Pr1l6WoErz?customer_ident=<YOUR_CUSTOMER_ID>
This will update the unique customer ID in the web app, which you can access through webhook calls.
Redirecting after a successful payment
You can customize any BoomFi pay link to automatically redirect your customers after they complete a payment. This is possible by incorporating a redirect URL as a query parameter in the original pay link URL. To perform this, follow the example below:
Original pay link URL
https://pay.boomfi.xyz/2bm4YuFSaw011jTWbevVPA3137q
Pay link URL with customer's id
https://pay.boomfi.xyz/2bm4YuFSaw011jTWbevVPA3137q?redirect_to=<REDIRECT_URL>
As the example above shows, a redirect_to query parameter was added to allow BoomFi to know where to redirect the customer after the payment.
Changing the amount and currency of a pay link
BoomFi gives you the flexibility to change the amount and/or currency of a paylink on the go.
Use cases for this feature:
- Allow your customer to pay in another currency.
- Give customers the ability to top-up their balance/wallet.
- Tipping or donations are to be added to the final amount.
To use this feature, you will make an API call to the Generate Variant URL endpoint and add the following query parameters:
amount: The new desired amount of the paylink.currency: The new currency the pay link will be paid with.
You can also add the following to edit your pay link URL further:
customer_ident: A customer's unique identifier to be connected to the generated pay link.redirect_to: a URL to redirect the customer upon successful payment.
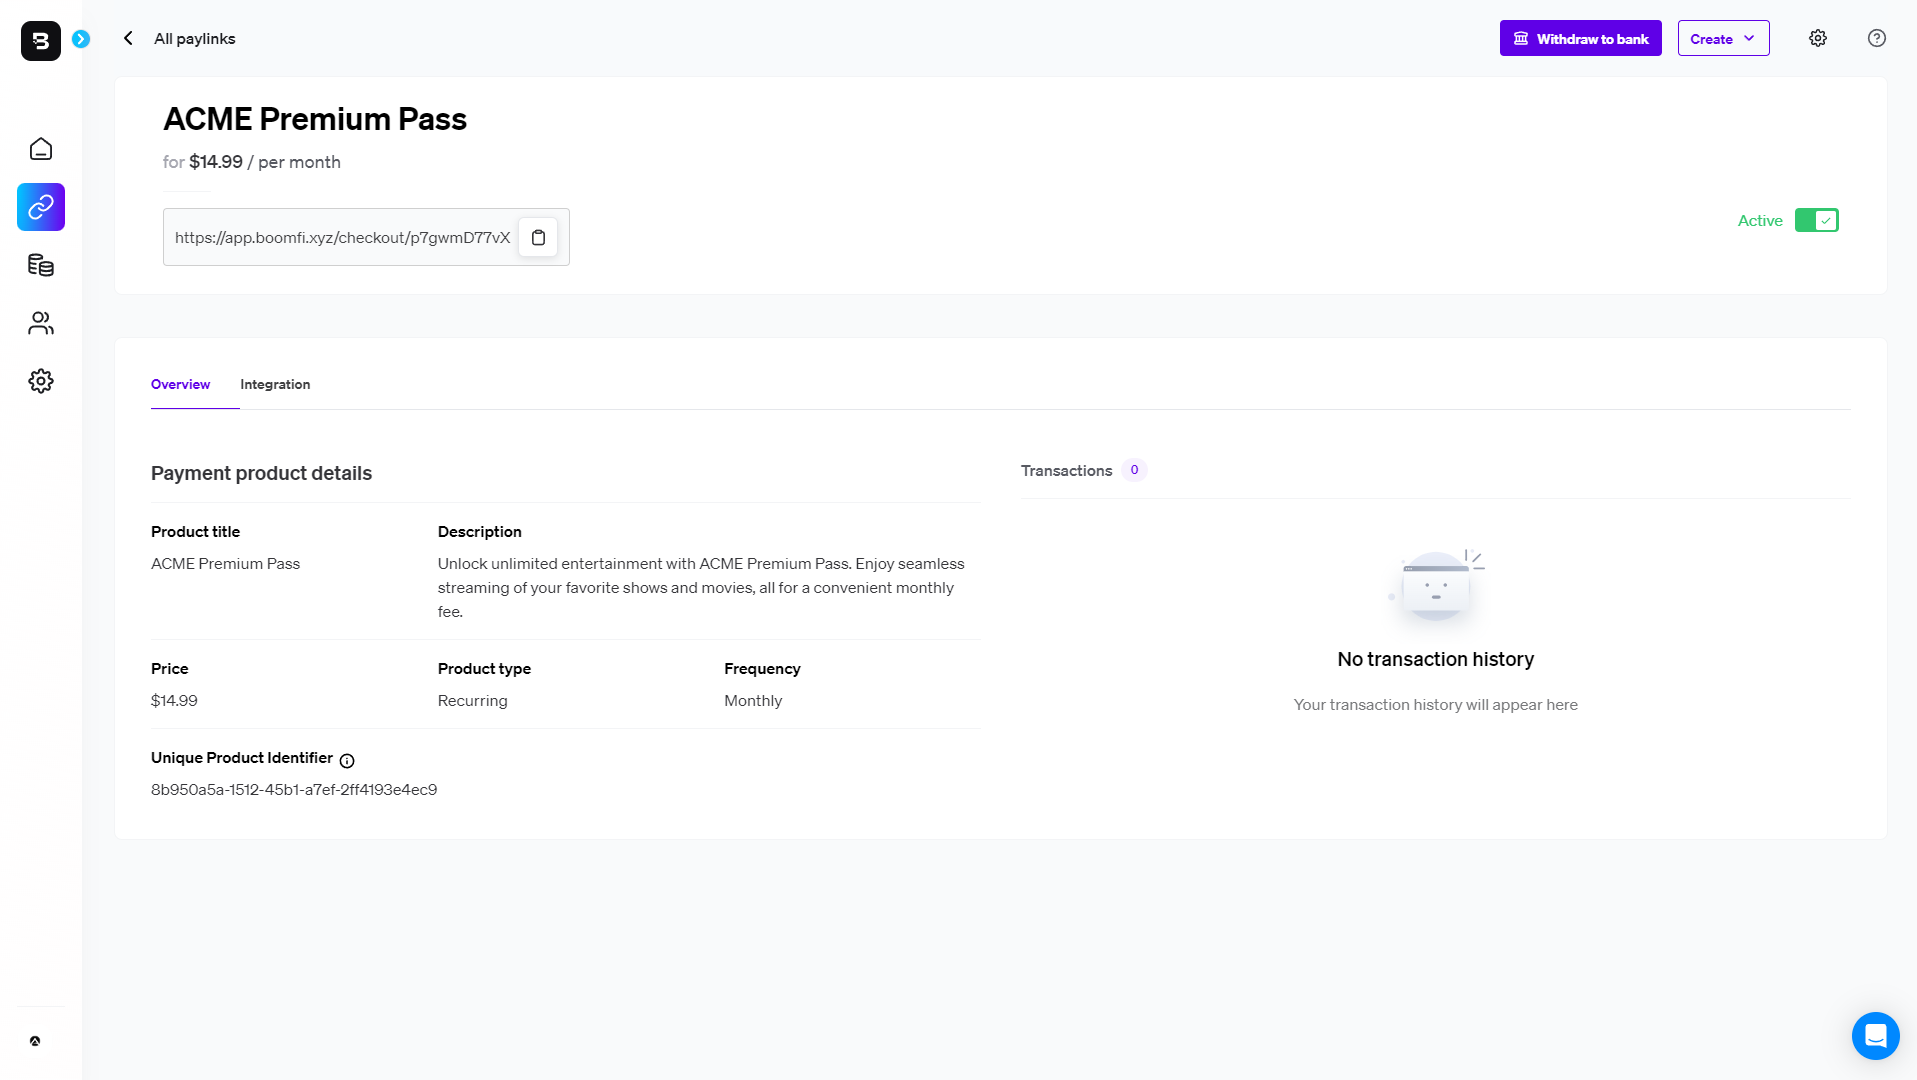
Managing Your Pay Links
BoomFi's dashboard allows you to efficiently manage your Pay Links. Here’s what you can do:
- View Performance: Track the number of payments received and the total revenue generated.
- Control Activation: Toggle between active and inactive states, and delete deactivated links if necessary.
Access Detailed Information about Pay Link:
- Information: View specific details about the Pay Link’s attributes and settings.
- Transactions: Check the payment history associated with the Pay Link.
- Activation Status: Use the toggle button to change the link's active or inactive status.
Updated 6 days ago